
- Welcome
- StarWheel Gallery
- The StarSpheres
- The StarWaves
- StarWheel Online Store
- SW Wisdom Cards
- SW Reading with Aya
- About Aya
- En Français
- StarWheel Vision
- Creative In-Spiration
- SW Stencil Gallery
- Aya Now Blog
- Sacred Arts 21st
- SW Collection for Sale
- 13 StarWheels for Sale
- Creative Investments
- StarWheel Foundation
- Fund Raising for Land
- Sacred Geometry School
- StarDome Eco-Campus
- SW Museum Project
- SW Commissions
- Sheevaya Designs
- StarWheel Picto-Koans
- StarWheel Sutras
- 3D StarWheels
- SW 3D Animations
- Mystical Poetry by Aya
- We Are light
- Mandalas by Children
- Global Mandala Contest
- SW Games
- Sacred Labyrinths
- Sedona Tours
- Studio Visits with Aya
- Peace Garden
- Earth Paradise Garden
- Global Renaissance

- Family Links
- Join the SW Club
- SW Testimonials
- Search the StarWheels
- Using the StarWheels
- Mandala Making Notes
- Download SW Designs
- Upcoming Events
- Donations
- Permission to use
- Contact The Team
MM3 Step by Step Instructions
Step by Step Practical Instructions
After preparing yourself and your creative space, here are the steps we found to be the most helpful:
1. Use a regular size paper (about 21 cm wide). Format your paper to be square (21 cm by 21 cm) by cutting off extra paper.
Tracing a circle within a square is the traditional and symbolic way. It has the meaning of unification between the earth (the square of the four directions) and heaven (the circle of the sky dome).
2. Find the center spot on your paper by tracing the diagonals:
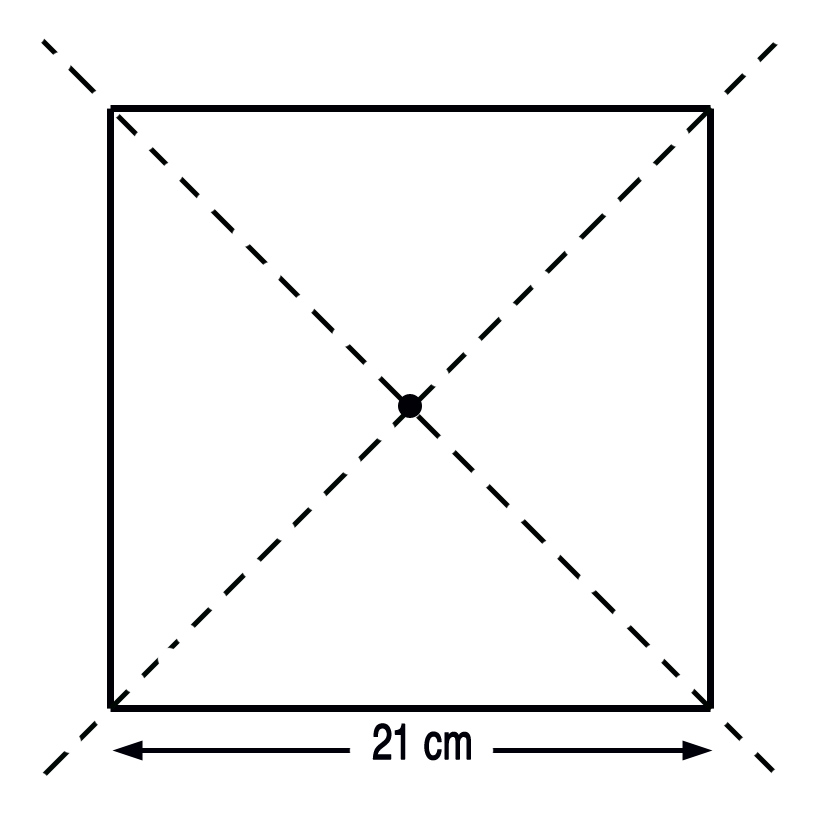
In ancient cultures, the center of a temple or ceremonial site was determined by the shadows of a stick at sunrise & sunset, preferably at the time of the equinox. Here our land is the paper, but marking the center is equally important.
In the Hindu tradition, the center spot is called the Bindu, the dimension-less seed of the center.
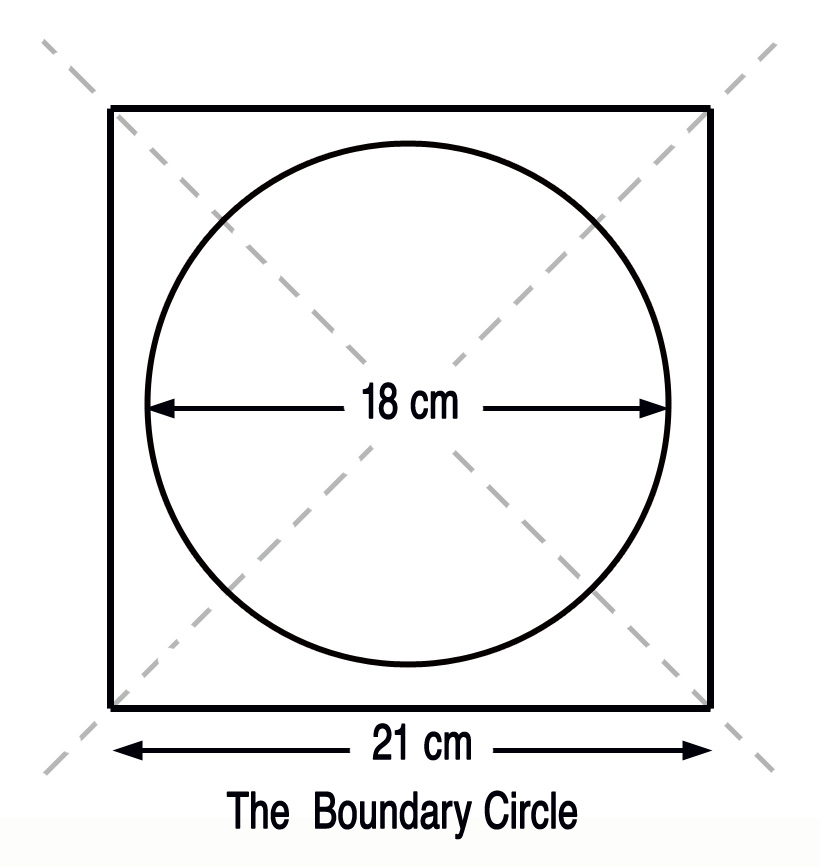
3. Trace the Boundary Circle.
From the center, trace a circle of about 18 cm diameter. You can use a compass centered on O. Or you can center the Mandala Protractor on O and trace the circle around it, since the Mandala Protractor is about 18 cm diameter.
So now you have your circle within a larger square: you have delimited a sacred space, you have traced a basic "mandala" ("that which contains the essence"). Within that sacred boundary, your mandala will be protected, energized and progressively born.
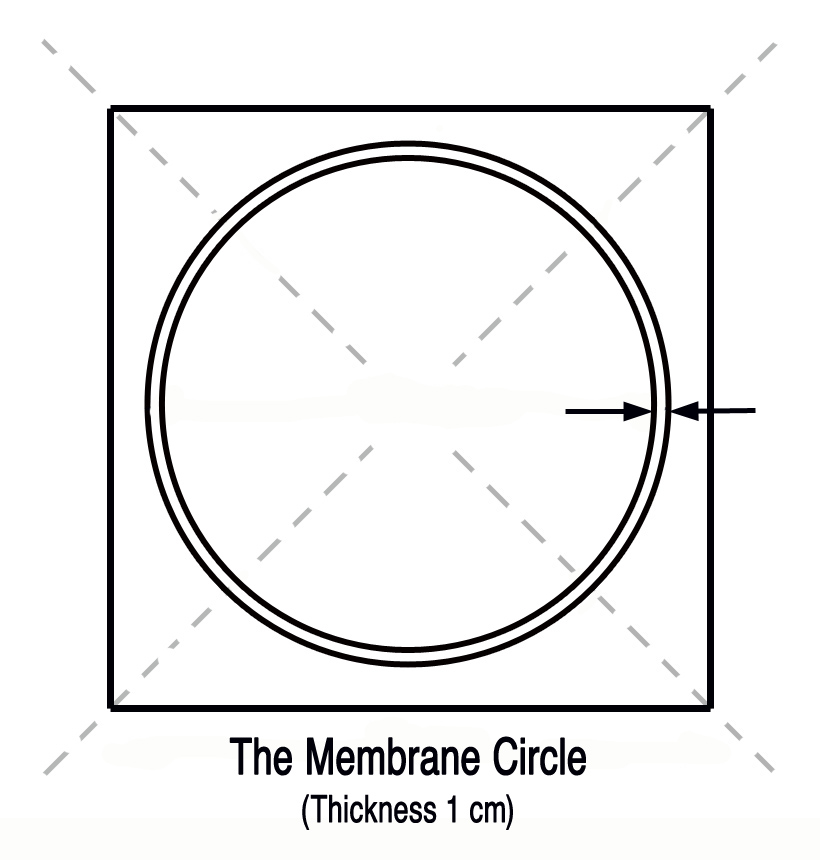
4. Next we can trace the Membrane Circle.
This is, like in a biological cell, the "skin" whose function is to be an intermediary between the higher frequencies inside the mandala and the energies of the external world (here the square around the mandala). It is a transmission/communication system. In Tibetan mandalas, there are several bands corresponding to various densities of the "elements".
For our purpose here, this can be a thin band (1 to 2 cm) that, later, you will fill with your own symbols or colors.
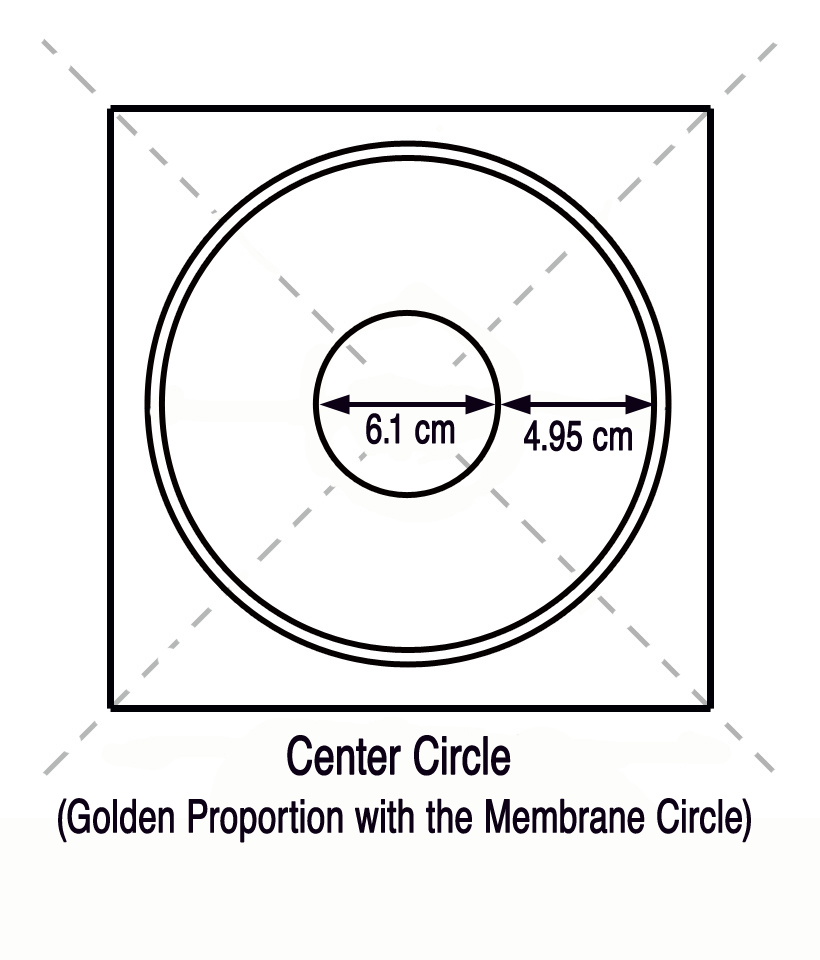
5. Next we will trace a Center Circle. This is the hub and heart of your mandala. It is like the nucleus of the cell, containing the DNA. It represents the Origin of All, Infinity, the Source of Life and Consciousness... It is the place of the brightest spirit light. It also represents You as your Higher Self. In many oriental traditions, this center is Sunya, the Void - not an empty void, but a void containing all potential manifestation. Science has an approaching term: the quantum plenum. It is the Holy of Holies, at the heart of a sacred temple.
Practically, you delimit a Center Circle where you will put symbols and colors that are the most important to you. You can trace it any size you want following your guidance and creative intuition, but we suggest you start incorporating Sacred Geometry by using the Golden Proportion between your Boundary circle and your Center Circle. Refer to the section "How to Integrate Sacred Geometry in Your mandala").
With an overall circle of 18 cm in diameter, the diameter of the Center Circle will be about 6.8 cm in diameter or 3.4 cm in radius. If you take into account the Membrane Circle (1 cm on each side), you then have a Center Circle of Golden Proportion measuring bout 6.1 cm in diameter or 3.05 cm in radius. Either way, the eye will recognize the presence of the Golden Proportion as a pleasant harmony.

6. Okay, now you are ready to layout a geometric structure in the main body of your mandala i.e. between the membrane circle and the center circle. Now it is time to decide upon an overall geometry This is very important: you choose a fundamental structure pattern for your mandala i.e. you pick a symmetry by dividing the 360º circle into the integers 2 to 12. Refer to the next section: ("Symmetry Groups in a Mandala") to see the figures of the various symmetries you can choose from. The Appendix also gives large size examples of the same symmetries.
As you let yourself be intuitively guided to a symmetry that feels attractive to you, you can use your compass to compute it, or a regular protractor or the MANDALA PROTRACTOR inserted in this book. (Refer to the section "How to use the Mandala Protractor"). You can also use tracing paper on the large size examples in the Appendix to mark the points of the symmetry you choose and report them on your mandala draft.
7. After tracing some symmetry in the main body of your mandala, you now have a good template and structure and you are ready to let your creative imagination fill the blanks, add more elements, extend lines, draw connections, overlay patterns, colors, symbols... You can now add diversity to the symmetric, unified structure you already have...
You can draw more elements or also just use colors and blend them in ways that suggest more elements...